Highest-quality

Products, resources, and support for oboists of all ages and levels of ability

Does the Plaque Make a Difference?

There are many types of plaques to choose from; those with rounded or pointed edges, those made of metal or wood, or even those which are backlit. How do you choose the one that’s right for you? Here are some common arguments for each:

1.) Plaques with rounded edges are less likely to damage the sides of a reed when inserted. A pointed edge is more apt to tear a piece of cane than a rounded edge, especially if one of the points is bent.

2.) A darker colored plaque is easier to see through the blades of a reed. This is particularly helpful when working on the tip, as you want to ensure that the thinnest part of the tip is the very top corners. The thinner the area, the more the darkness of the plaque will show through.

3.) Wooden plaques are less common and are generally not flat; instead, they are raised in the center. These plaques can cause the reed to have loose sides, as they push the blades of the reed apart when inserted. They should be avoided.

4.) The newest kind of plaque is backlit and rather expensive. Once inserted between the blades, a small light illuminates the inside of the reed to show the thickest and thinnest areas.

Here at Double or Nothing Reeds, we use rounded steel plaques. If you’re trying to decide which is best for you, we recommend you buy a few and experiment! (With the exception of the backlit plaques, they are all fairly inexpensive).

Happy Reedmaking!

Why Do I Need a Reed Case?

Why Do I Need a Reed Case?

Well, basically a good reed case is needed to protect and prolong the life of your reed.  Whether you’re purchasing your reeds or making them on your own, we all know that having a good reed is an asset.  A good reed case does not need to be expensive; it just needs to do its job effectively. 

Look for these things when choosing your reed case:

1.      Does it stay closed when stored?

2.      Can you get your reed in and out easily without damaging the tip?

3.      Will your reed be able to dry out while in the case? (Something that is all plastic could be problematic.)

If you answered yes to these questions, then your reed case is suitable.  If you are looking for a good, inexpensive reed case, check out the selection from Double or Nothing Reeds … WOW!

Golden Rules for Ensemble Playing

Just a Few:

  1. Everyone should play the same piece.
  2. Stop at every repeat sign and discuss in detail whether to take the repeat or not. The audience will love this a lot!
  3. If you play a wrong note, give a nasty look to one of your partners.
  4. Keep your fingering chart handy. You can always catch up with the others.
  5. Carefully tune your instrument before playing. That way you can play out of tune all night with a clear conscience.
  6. Take your time turning pages.
  7. The right note at the wrong time is a wrong note (and vice-versa).
  8. If everyone gets lost except you, follow those who get lost.
  9. Strive to get the maximum NPS (note per second). That way you gain the admiration of the incompetent.
  10. Markings for slurs, dynamics and ornaments should not be observed. They are only there to embellish the score.
  11. If a passage is difficult, slow down. If it’s easy, speed it up. Everything will work itself out in the end.
  12. If you are completely lost, stop everyone and say, “I think we should tune”.
  13. Happy are those who have not perfect pitch, for the kingdom of music is theirs.
  14. If the ensemble has to stop because of you, explain in detail why you got lost. Everyone will be very interested.
  15. A true interpretation is realized when there remains not one note of the original.
  16. When everyone else has finished playing, you should not play any notes you have left.
  17. A wrong note played timidly is a wrong note. A wrong note played with authority is an interpretation.

Taken from http://www.elliott-randall.com

Staples

Does the Staple Really Make a Difference?

We have been asked time and time again about staples (also referred to as tubes or corks).  The staple is an important part of the reed that is, often times, not considered carefully.  Since it is the foundation of your reed, you would be wise to evaluate what you are using.  There are many metal used in manufacturing a staple with the most common being brass and nickel silver.  Staples come in lengths from 45 – 48mm with 47mm ranking first in popularity and 46mm ranking second.  There are also various textures for the outside of the metals.  We find these characteristics to be things left to personal choice.  However, the following characteristics should be considered carefully when choosing your staple:

1.      Does your staple fit your mandrel (make sure you have a good mandrel!)  The staple should be flush with the end of your mandrel to avoid bending any part of the staple when wrapping.  AND YES … it is very important to wrap your reed with the mandrel inserted into the staple.

2.      Examine the cork on your staple.  First, it should be made of natural cork, not something that looks like a bunch of little specks of cork melded together (this particle-style cork tends to easily chip off and can become lodge in the oboe).  Second, the cork needs to be free of splits or missing pieces.

3.      The metal area of the staple needs to be free of damage.

4.      The staple needs to fit snugly into the oboe.  (You can use a small amount of Vaseline or cork grease to help with removing the reed from the oboe, but be sure is it rubbed in very well with no excess product visible.)

What do we use at Double or Nothing Reeds?

            Stevens Staples, #2 Thinwall, Brass

Reed Making Tools

Oboe Reed Adjusting and Reed Making Tools

Prioritized List

Following is a list of oboe reed making tools in priority order.  Many companies offer reed kits; however if you are unable to purchase the entire kit, the tools should be acquired in this order.

  1. Good, quality double hollow ground knife (the most essential tool, must be high quality)
  2. Flat plaque with rounded ends
  3. Block
  4. Sharpening stone (India stone preferred)
  5. Mandrel
  6. Gouged, shaped and folded cane
  7. Staples
  8. Thread
  9. Beeswax
  10. Metric ruler
  11. C-Clamp (2”)
  12. Box or pouch to hold tools

Items 1-4 will be used for adjusting and making reeds, items 5 – 8 will be used for making reeds only.

Recommended Equipment

Recommended Equipment for the Oboe Student 

Through our website, at camp and from our private students, we are continually asked about what equipment is needed for the oboe student.  Having the proper equipment often makes the difference between whether a student continues on the oboe or quits due to frustration.  Below are our recommendations based on the level of the student.  Besides your private teacher, the two most important things to ensure the success of an oboe student at any level are a decent oboe and a good reed!

Beginner

  • Oboe – in good working condition (prefer a modified conservatory system; such as Fox 330 or Nobel)
  • Handmade reeds – always have 3 in good working condition(to learn proper embouchure, breath support, pitch and tone)
  • Reed case – to hold at least 3 reeds (Reeds are delicate and expensive.  They also need to be able to dry out when put away.)
  • Swab – to clean out the oboe after each use (this will save on repair costs)
  • Cork Grease – to keep cork joints properly lubricated
  • Metronome – to learn to play properly in time
  • Music – as designated by your teacher

Intermediate
All of the above remain important, plus:

  • Oboe with at least a modified conservatory system; such as Fox 330 or Nobel (this will enable the student to have all the keys needed for the music at this level of playing)
  • Tuner – to learn hear proper pitch relationships
  • Reed making kit – to begin the process of making reeds (this takes several years to accomplish)

Advanced
All of the above remain important, plus:

  • Oboe – the modified conservatory system oboe will also work at this level; however, it is important to consider a professional instrument at this point – depending on the intended   future of the student.  If the student plans to participate in select performing groups, attend college as a music major or minor, compete in concerto competitions, audition for other select opportunities. (Loree oboes are recommended)

Detailed information:

Handmade reeds – be sure to purchase your reeds from a professional oboist.  A quality handmade reed will help with tone, pitch, and proper development of the student’s support and embouchure.

Reed Making Kit
Needs to include:

  • Good quality, double hollow ground knife
  • Mandrel
  • Block
  • Plaque
  • Block (sometimes called billot)
  • Nylon thread (FF gauge)
  • Beeswax
  • Staples (sometimes called tubes)
  • Shaped, gouged and folded cane
  • Metric rule (6” size)
  • Sharpening stone

Other helpful things:

  • C-clamp
  • Razor blades
  • Carrying case or box

As always, we invite you to call or email us with any questions.  
You can reach us at DoubleOrNothingReedsLLC@gmail.com or 513.222.3287. 
 www.DoubeOrNothingReeds.com

Camps and Classes

Attending a summer double reed camp can be one of the most rewarding experiences of the year.  Just think, you can finally surround yourself with an entire room of oboe or bassoonists.  Get answers to your questions about reeds, tone, intonation, musicality, technique and so on … not to mention the coaching expertise of master teachers. You will also have the opportunity to play wonderfully unique chamber music and hear the faculty perform live and in person. We encourage you to check out these successful oboe camps … and tell your friends too!

Midwest Oboe Camp – Kenyon College in Gambier, Ohio  www.MidwestOboeCamp.com June 9 – 14, 2013

Queen City Double Reed Camp – Xavier University in Cincinnati, Ohio – INFO TBA

Maine Camp for Adult Oboists – University of New England in Biddeford, Maine  www.OboeCamps.com 

Resources for Performance Anxiety

Ever since I began playing the oboe at age 12, I have suffered from performance anxiety of varying degrees. In middle school it didn’t seem so bad (I was the only oboist and that made me pretty freakin’ cool if I do say so myself…of course, my SOUND on the other hand left a lot to be desired). Nevertheless, when I got into high school the anxiety became worse; as a somewhat decent oboist, I began to get solos in band pieces and was encouraged to audition for ensembles such as District and All-State band. My nervousness was directly related to the importance of the audition. I struggled a lot. In fact, I remember thinking that if I could just get over my nerves, I could REALLY play the oboe. College rolled around and I decided to attend Baylor University as an oboe performance major. It was in these four years that the performance anxiety became almost debilitating. While it is true that performance anxiety eases with time and experience, that reassurance probably doesn’t help you NOW. So here’s a few books that will:

Picture

1. A Soprano on her Head: Right-Side-Up Reflections on Life and Other Performances, by Eloise Ristad

Picture

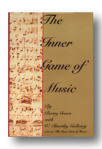
2. The Inner Game of Music, by Barry Green and Timothy Gallwey

Picture

3. Audition Success, by Don Green

Picture

4. Performance Success, by Don Greene

There’s more where this came from, but this should get you started. Happy Reading (and Reed-ing, HAHA!!)

Melissa